지난 시간에 이어서 Goolge OAuth 2.0을 web application에 적용하는 방법을 알아보겠습니다. 전체적인 단계는 아래의
순서로 살펴보겠습니다.
- Create user authorization credentials
- web application에 적용해서 Login / Logout 구현하기
- Token 전송 및 Google API 호출 / 사용하기
Create user authorization credentials을 진행했으니, 나의 web application에서는 해당 OAuth 2.0 Client ID를 이용해서 Google OAuth를 통해 Login이 가능한 환경이 되었습니다. 제가 적용을 하려고 하는 web applicaton은 vue.js 2.9.6 입니다. 그렇다면 vue.js에 Google OAuth 2.0을 적용하는 방법을 차근차근 알아보겠습니다.
1. Basic Setting for SignIn
가장 우선적으로 Google Platform Library를 로딩해 주어야 합니다. 로딩하는 방법은 기타 다른 Library를 index.html에 로딩해 주는 방식과 동일합니다.
<script src="https://apis.google.com/js/platform.js" async defer></script>그 다음으로는 지난 시간에 생성한 내 web application의 OAuth 2.0 Client ID를 meta로 지정해 줍니다.
<meta name="google-signin-client_id" content="YOUR_CLIENT_ID.apps.googleusercontent.com">여기서 Google Developer에서는 한가지 ★Note를 남겨주었습니다. 이 부분은 추후 구현해 보겠습니다. 어떤 분들은 Library보다 button이 먼저 생성 될 경우, 동작이 안된다고 하는 경우도 있다고 하는데 충분히 가능해 보이는 상황입니다.
Note: You can also specify your app's client ID with the client_id parameter
      of the gapi.auth2.init() method.
client_id를 gapi.auth2.init() 메서드에서 지정이 가능하다고 하니, 여기서 그 힌트를 얻을 수 있습니다. 명시적으로 OAuth Library를 로딩할때 해당 메서드를 실행하기 때문에 시점차에 따른 오류가 발생하지 않을 것 입니다.
이제~ vue.js의 Login관련 페이지에 Google SignIn button을 넣어줍니다.
[Login.vue]
<template>
  <div class="g-signin2" data-onsuccess="onSignIn"></div>
</template>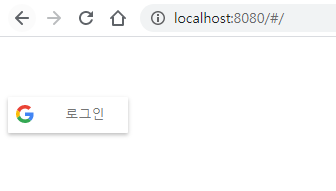
이렇게 자동으로 Google SignIn button이 생성되어 보여집니다. 그럼 해당 버튼을 눌러 볼까요??

오 정상적으로 내 계정이 보이면서 로그인이 가능해 졌습니다. 본인인증을 한번더 거치게 되면 아래와 같이 Google SignIn button은 Signed in으로 변경되었습니다.

[Error 해결]
{error: "idpiframe_initialization_failed",
details: "Not a valid origin for the client: http://localhos…egister this origin for your project's client ID."}
위의 Error발생할 때, 생각해 보아야 할 경우는 2가지 정도 일 듯 합니다.
(1. meta tag에 Client ID를 제대로 넣었는지 확인)
Google Cloud Platform에서 OAuth 2.0 Client ID에 대해서 자동으로 복사해주는 기능을 아래와 같이 버튼으로 제공하는데, 해당 버튼을 클릭하면 Client ID뿐만 아니라... 뒤에 apps.googleusercontent.com까지 함께 복사가 됩니다. 따라서 아무생각없이 YOUR_CLIENT_ID만 선택해서 ctrl + v를 하게 된다면... 아래와 같이 뒤의 URL이 중복되는 효과가 발생합니다. 이 경우에 위의 에러가 발생합니다.
YOUR_CLIENT_ID.apps.googleusercontent.com.apps.googleusercontent.com

(2. 승인된 자바스크립트 원본에 URI가 잘못 되었는지 확인)
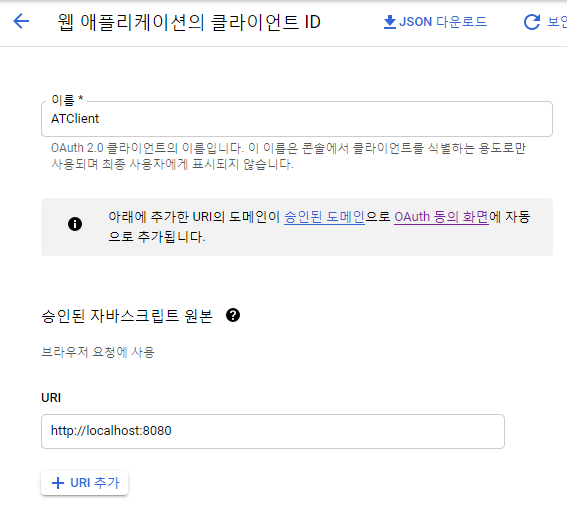
자신이 서비스하는 주소와 일치하는지 다시 확인해 보면 됩니다.
2. SignOut with vue.js
로그인을 했으니... 이제는 로그아웃을 구현해 보겠습니다. Google OAuth를 통해서 SignIn을 수행하면, 다양한 메서드를 제공하는 Authentication Instance가 생성이 됩니다. 이 인스턴스에서 제공하는 메서드 중에서 SignOut( )을 실행하면 사용자는 Google OAuth로 부터 로그아웃이 됩니다.
그렇다면, vue.js를 통해서 해당 Authentication Instance의 생김새를 살펴보도록 하겠습니다.
[Login.vue]
<template>
  <div>
    <div class="g-signin2" data-onsuccess="onSignIn"></div>
    <button @click="authInst">signout</button>
  </div>
</template>

<script>
export default {
  data() {
    return {

    };
  },
  methods: {
    authInst() {
      // eslint-disable-next-line
      console.log(gapi.auth2.getAuthInstance());
    },
  },
};
</script>
버튼을 하나 생성하고 해당 버튼을 통해서 methods중에서 authInst를 실행하여 console.log로 찍어보았습니다.
$w {Rl: vx, KW: {…}, Ie: ƒ, jj: ƒ, fq: ƒ, …}
    FH: ƒ ()
    Ie: ƒ ()
    KW: {Ie: ƒ, jj: ƒ, fq: ƒ, kj: ƒ, FH: ƒ, …}
    Rl: vx {ya: {…}, KQ: "single_host_origin", SU: false, Lu: true, qq: undefined, …}
    YB: ƒ ()
    attachClickHandler: ƒ ()
    currentUser: Kw {ee: Uw, c0: Jw, Wb: Hw}
    disconnect: ƒ ()
    fq: ƒ ()
    getInitialScopes: ƒ ()
    grantOfflineAccess: ƒ ()
    isSignedIn: Kw {ee: true, c0: Jw, Wb: Hw}
    jj: ƒ ()
    kj: ƒ ()
    oF: ƒ ()
    signIn: ƒ ()
    signOut: ƒ ()
$w 인 것으로 보면... window interface로 보여지며, 전역변수로 관리가 되는 것으로 판단할 수 있습니다. 그렇다면 정식으로는 vue 코드에서 바로 gapi.auth2로 호출하는 것이 아닌... window.gapi.auth2로 호출하는게 맞을 것 같습니다.
왜냐하면, 아래와 같이 변수로 받아서 signOut을 구현해 보려고 하면 오류가 발생하기 때문입니다.
[Error 해결]
<template>
  <div>
    <div class="g-signin2" data-onsuccess="onSignIn"></div>
    <button @click="signout" align="left">signout</button>
  </div>
</template>

<script>
export default {
  data() {
    return {

    };
  },
  methods: {
    signout() {
      const authInst = gapi.auth2.getAuthInstance();
      // eslint-disable-next-line
      console.log(authInst);
    },
  },
};
</script>
✘ http://eslint.org/docs/rules/no-undef 'gapi' is not defined
src\components\Login.vue:17:24
const authInst = gapi.auth2.getAuthInstance();gapi가 정의되지 않아서 Error가 발생합니다. 따라서, window interface를 호출하는 방식으로 구현해야 합니다.
gapi.auth2.getAuthInstance() => window.gapi.auth2.getAuthInstance()
이렇게 하면 Error가 없이 정상적으로 동작하게 됩니다. 그렇다면 SignOut이 구현된 최종 코드를 확인해 보겠습니다.
[Login.vue]
<template>
<div>
<div class="g-signin2" data-onsuccess="onSignIn"></div>
<button @click="signout" align="left">signout</button>
</div>
</template>
<script>
export default {
data() {
return {
};
},
methods: {
signout() {
const authInst = window.gapi.auth2.getAuthInstance();
authInst.signOut().then(() => {
// eslint-disable-next-line
console.log('User Signed Out!!!');
});
},
},
};
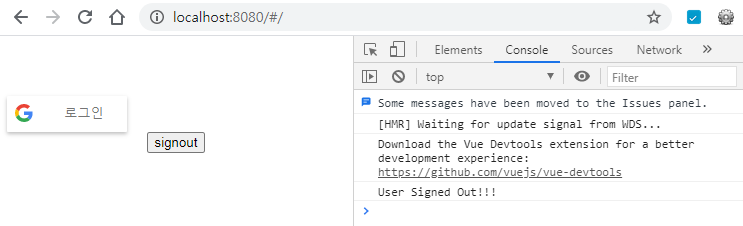
</script>SignIn이 된 상태에서 signout 버튼을 누르면,

아래와 같이 Google SignIn button은 "Signed in" -> "로그인" 으로 바뀌고, console.log에도 정상적으로 signed out이 되었다고 출력이 됩니다.
3. Customize SignIn button
아까 구현하다가 미처 진행이 되지 않은 부분이 있습니다. SignIn은 정상적으로 되었지만, 사용자의 profile information을 정상적으로 가져와서 출력하는 부분이 구현되어 있지 않습니다. 이제 해당 부분에 대해서 구현해 보도록 하겠습니다. vue.js로 Google SignIn의 onSuccess이벤트를 구현하기 위해서는 Custom SignIn button을 적용해야 합니다.
gapi.signin2.render( )로 구현하면 자체구성하는 method로 onSuccess이벤트를 구현할 수 있습니다. 그리 어렵지 않으니 우선 Full Code를 통해서 확인해 보겠습니다.
[Login.vue]
<template>
  <div>
    GOOGLE User INFO : {{googleUser}}<p/>
    <div id="my-signin2"></div><p/>
    <button @click="signout" align="left">signout</button>
  </div>
</template>

<script>
export default {
  data() {
    return {
      googleUser: null,
    };
  },
  mounted() {
    window.gapi.signin2.render('my-signin2', {
      scope: 'profile email',
      width: 240,
      height: 50,
      longtitle: true,
      theme: 'dark',
      onsuccess: this.onSuccess,
      onfailure: this.onFailure,
    });
  },
  methods: {
    onSuccess(googleUser) {
      // eslint-disable-next-line
      console.log(googleUser);
      this.googleUser = googleUser.getBasicProfile();
    },
    onFailure(error) {
      // eslint-disable-next-line
      console.log(error);
    },
    signout() {
      const authInst = window.gapi.auth2.getAuthInstance();
      authInst.signOut().then(() => {
        // eslint-disable-next-line
        console.log('User Signed Out!!!');
      });
    },
  },
};
</script>
수정사항을 요약하면, 다음과 같습니다.
- 버튼을 호출하는 <div/>에서 class를 id로 변경
- life cycle중 mounted에서 window.gapi.signin2.render를 통해 button을 custom해주는 코드 작성
- 위의 <div/> 에서 id를 render method에서 지정한 이름으로 변경
- onsuccess, onfailure에 대해서 자체 method와 매핑할 수 있도록 render method 변경
- onSuccess에서는 googleUser를 인자로 받도록 구현
- onFailure는 error정보를 출력하도록 작성
이제 googleUser가 어떻게 생겼는지 확인해 보겠습니다. 실제적으로는 googleUser.getBasicProfile( )을 통해서 정보를 가져오도록 되어있는데, 비교해보겠습니다.
[googleUser]
Uw {Aa: "...", tc: {…}, Rs: Ww}
    Aa: "개인 ID"
    Rs: Ww
    At: "asdf@gmail.com"
    BT: "이름"
    RR: "개인 ID"
    Se: "성 이름"
    WI: "https://lh4.googleusercontent.com/.....photo.jpg"
    xR: "성"
tc:
    access_token: "ya29.a0AfH6SMCj0xYtkzl03eYvY08GvFp75HuonrQPZ7nOgTP0bf42BYDcCSYU_dW6g......"
    expires_at: 1617688273959
    expires_in: 3598
    first_issued_at: 1617684675959
    id_token: "eyJhbGciOiJSUzI1NiIsImtpZCI6ImUxYWMzOWI2Y2NlZGEzM2NjOGNhNDNlOWNiYzE0ZjY2......"
    idpId: "google"
    login_hint: "AJDLj6JUa8yxXrhHdWRHIV0S13cAnZRCrUGOOSCk-qKhkhx9kJu0NYOcPjlGCzV4QQSwKh......"
    scope: "email profile openid https://www.googleapis.com/auth/userinfo.profile https://www.googleapis.com/auth/userinfo.email"
많은 정보가 들어있습니다. 추후에 알아볼 token에 대한 정보들도 다수 포함되어있구요. 그렇다면 getBasicProfile( )을 통해서 가져온 정보는 어떤 모습일까요??
[googleUser.getBasicProfile( )]
Ww {RR: …}
    At: "asdf@gmail.com"
    BT: "이름"
    RR: "개인 ID"
    Se: "성 이름"
    WI: "https://lh4.googleusercontent.com/.....photo.jpg"
    xR: "성"
딱 필요한 정보만 들어가 있습니다. 추가적으로 원하는 정보만 딱 추출하는 method도 제공합니다.
[특정 정보 지정추출]
console.log(googleUser.getBasicProfile().getId());
console.log(googleUser.getBasicProfile().getName());
console.log(googleUser.getBasicProfile().getGivenName());
console.log(googleUser.getBasicProfile().getFamilyName());
console.log(googleUser.getBasicProfile().getImageUrl());
console.log(googleUser.getBasicProfile().getEmail());
이렇게 SignIn / SignOut구현이 완성되었습니다.
- Ayotera Lab -
댓글